

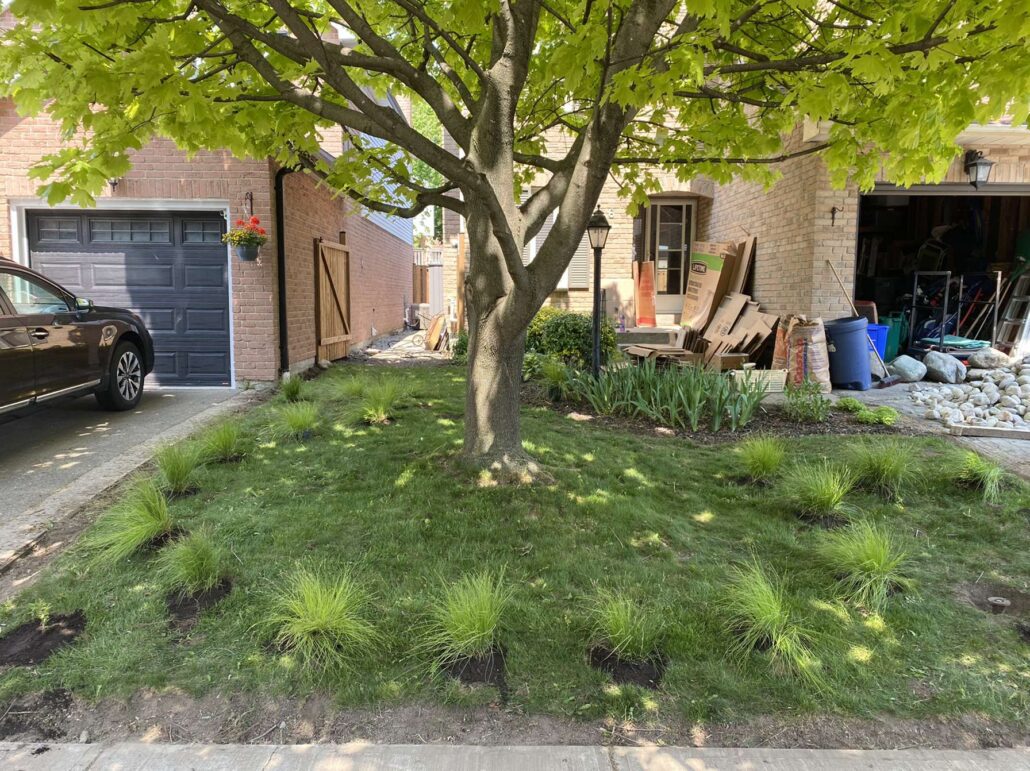
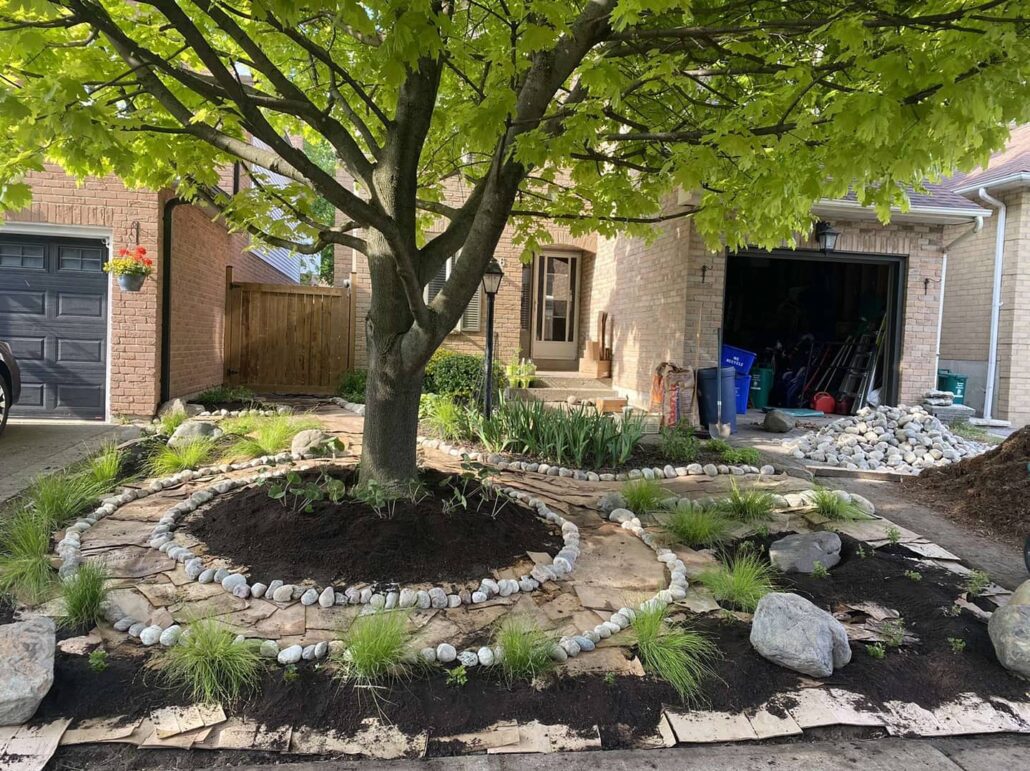
Turn this…

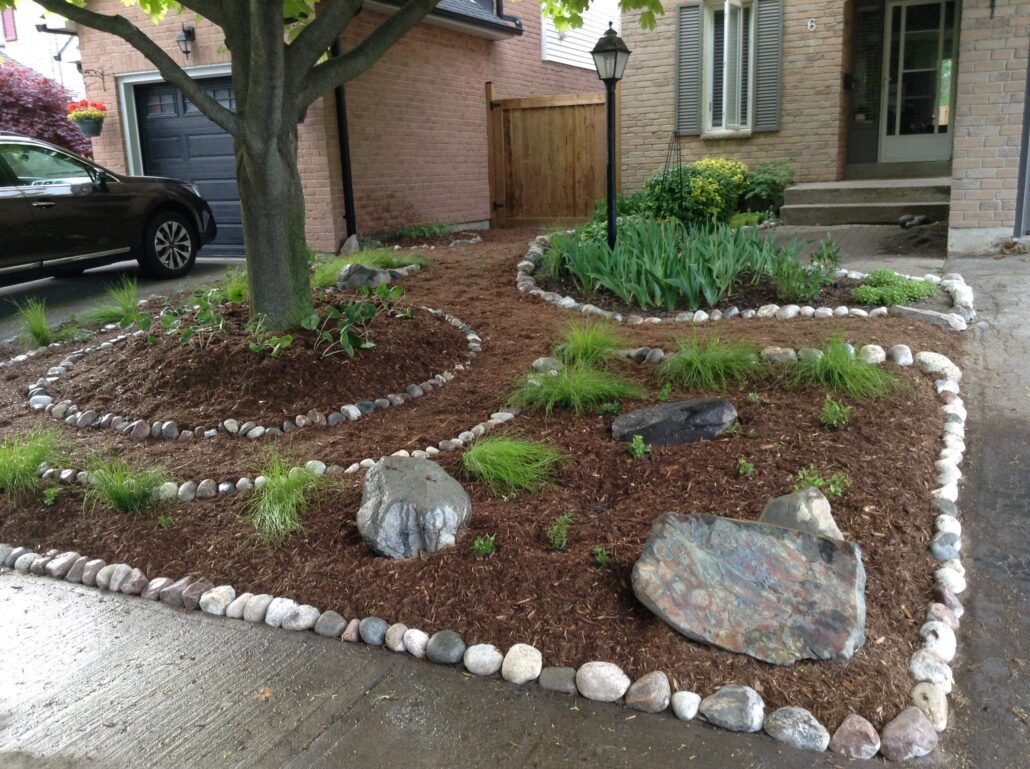
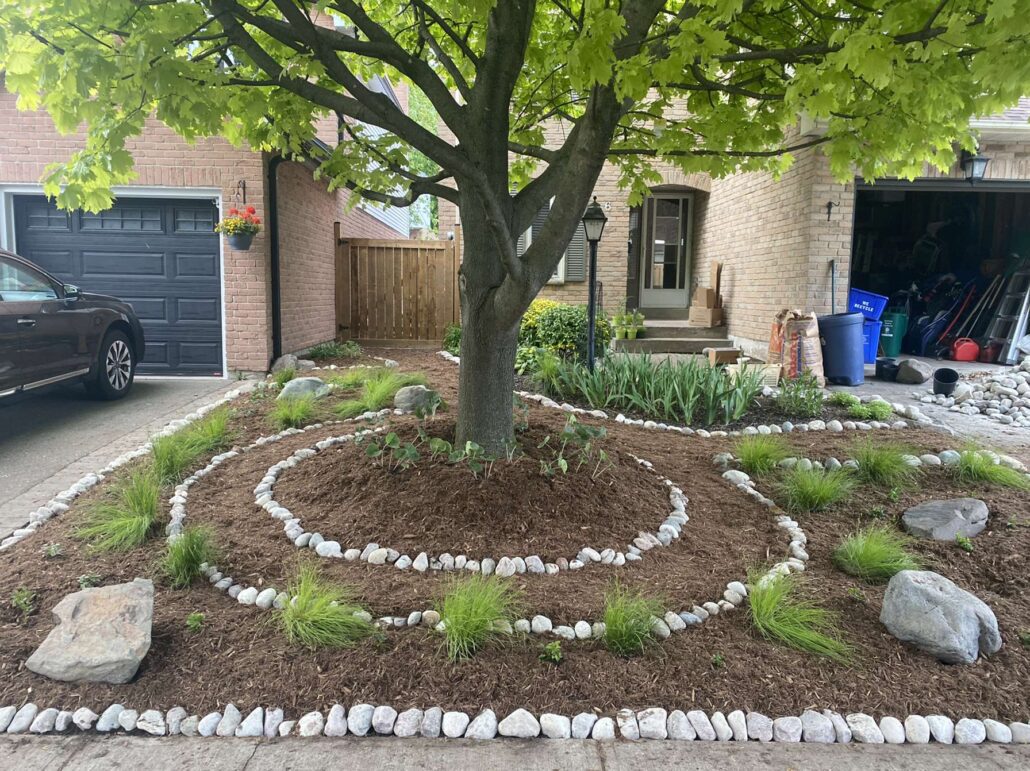
into this!
How to Fix an Ugly Lawn in One Day (the Easy Way)
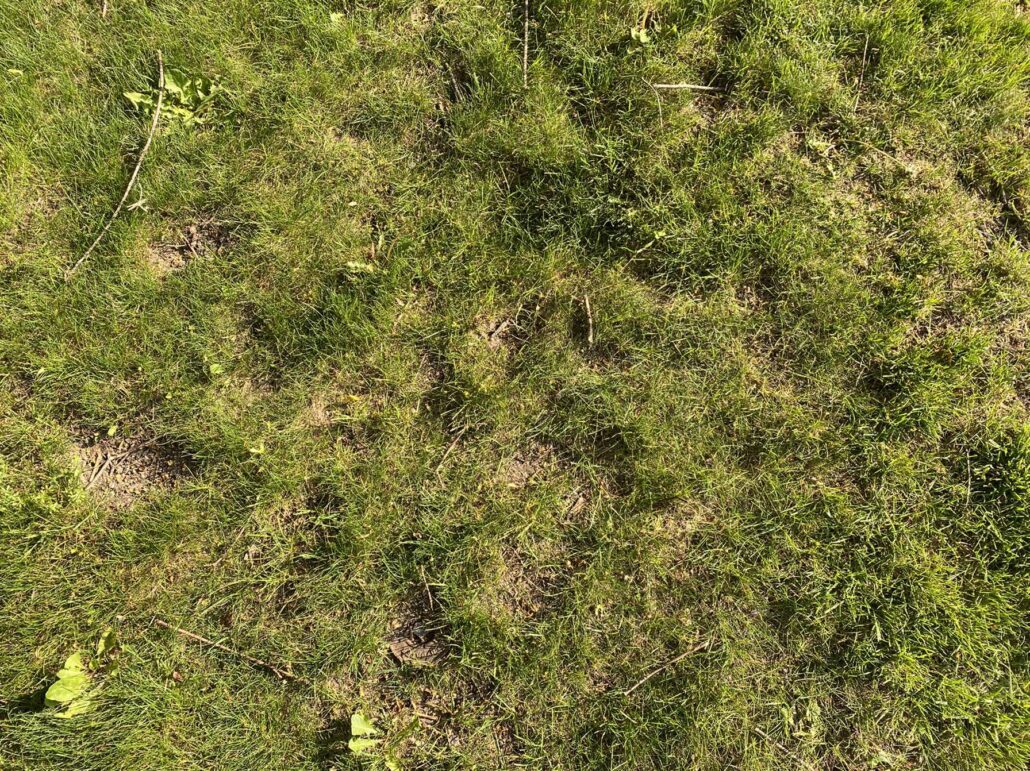
Your lawn is boring and ugly. There are bare patches everywhere, weeds popping up faster than you can kill them, and you can’t stand all the constant work that goes into keeping it presentable. I get it. My lawn used to be boring and ugly too. Now, it is a beautiful and unique collection of native plants and stones that turns heads and starts conversations. It makes all of my neighbors jealous, but the best part is that I will never have to mow the lawn again. Let me show you how I did it in just one day!
Step 1 : Overcome Limitting Beliefs
I’m a 23 year old working on growing my business and investing my income so that one day I can look at buying a house without having a panic attack. So when I say “my” lawn, what I really mean is my parents’ lawn. They’ve been taking care of the lawn ever since they moved into our house over 30 years ago. They mowed, fertilized, seeded, and weeded for years not realizing that there was a better solution.
Everyone else has a nice, thick, green, lawn, so they need one too, right?
Wrong.
There’s no reason you need to be like everyone else, competing to see who can grow the biggest, least diverse, monoculture of turfgrass.
Not once has anyone stopped to watch my dad cut the grass and congratulate him on his hard work.
However, we now have people stopping by all the time now to admire the new garden and ask us about the plants. Our front yard stands out more than any immaculate lawn can. If you want to blend into the background, call a lawn maintenance company. If you really want to wow your neighbors, all you need is a little bit of planning and garden design skills.
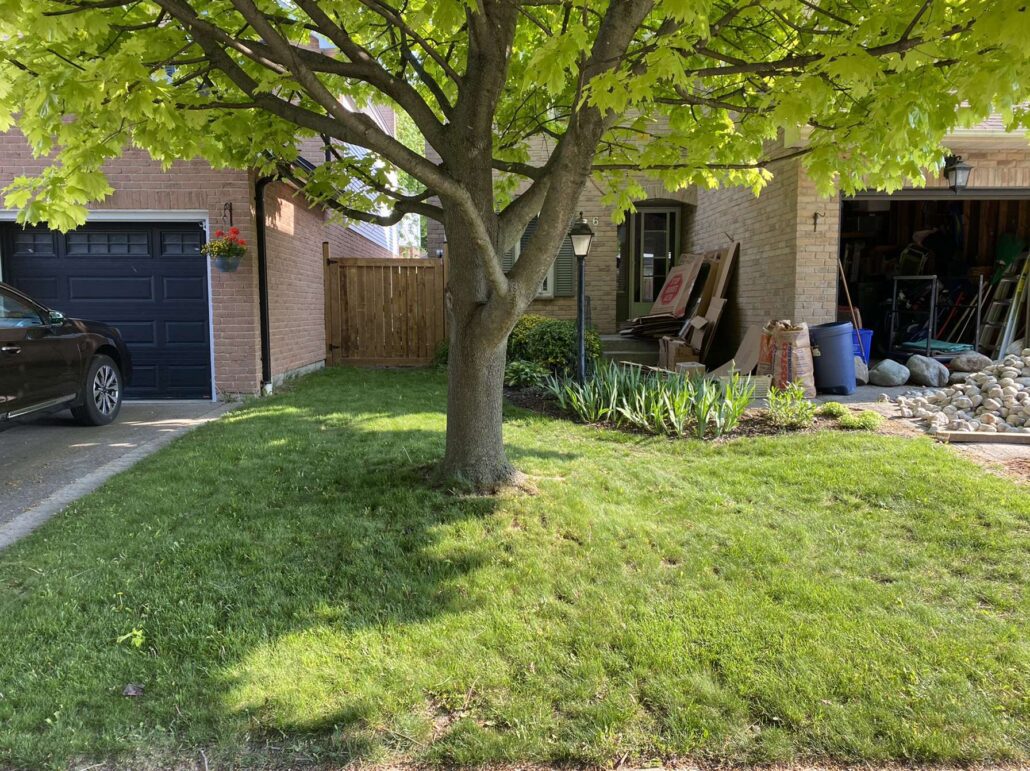
Why settle for this…
When you can have this!
Step 2 : Make a Plan
Everything is better with a plan. Determine your soil type and light conditions on your property and choose plants accordingly. We always recommend using native plants as they will be accustomed to your climate and will thrive with the least amount of maintenance. You will also want to plan where you want pathways cutting through your garden to get to the back yard or other areas of interest. You can get creative by incorporating different shapes, lines, and patterns in your garden. The plan will change considerably before you’re done but it’s almost impossible to start without one.
My front yard garden design includes sheet mulching (a process I will explain throughout the post), a whole bunch of native plants, some decorative boulders, and pathways connecting our driveway to the back gate as well as our neighbor’s driveway and going around our existing maple tree.
Step 3 : Gathering Materials
Once you have a plan, you will have a general idea of all the materials you will need for your garden. Here is everything we used for our garden:
Materials:
- 20 Pensylvania Sedges
- 20 Bunchberry
- 4 New Jersey Tea
- 10 Grey-Headed Coneflowers
- 8 Bottlebrush Grass
- 12 Wild Columbine
- 18 Wild Ginger
- LOTS of recycled cardboard
- 2 cubic yards of triple mix garden soil
- 1 cubic yard of river rock
- 2 cubic yards of woodchips
- 10 small boulders
Now that you have a plan and you’ve assembled all the materials, you can finally start building your front yard garden.
Step 4 : Edging
The whole point of sheet mulching is that you can cover up your lawn and kill the grass without digging up all the sod. However, you will still need to remove about 6 inches of sod along the perimeter of the area you want to sheet mulch. If you didn’t do this, the woodchips would spill over onto the sidewalk and the driveways giving us less room to walk and park our vehicles. We also had a water access fixture on our lawn so we had to dig an edge around it so that it wouldn’t be buried. Be sure to identify any utilities before digging!
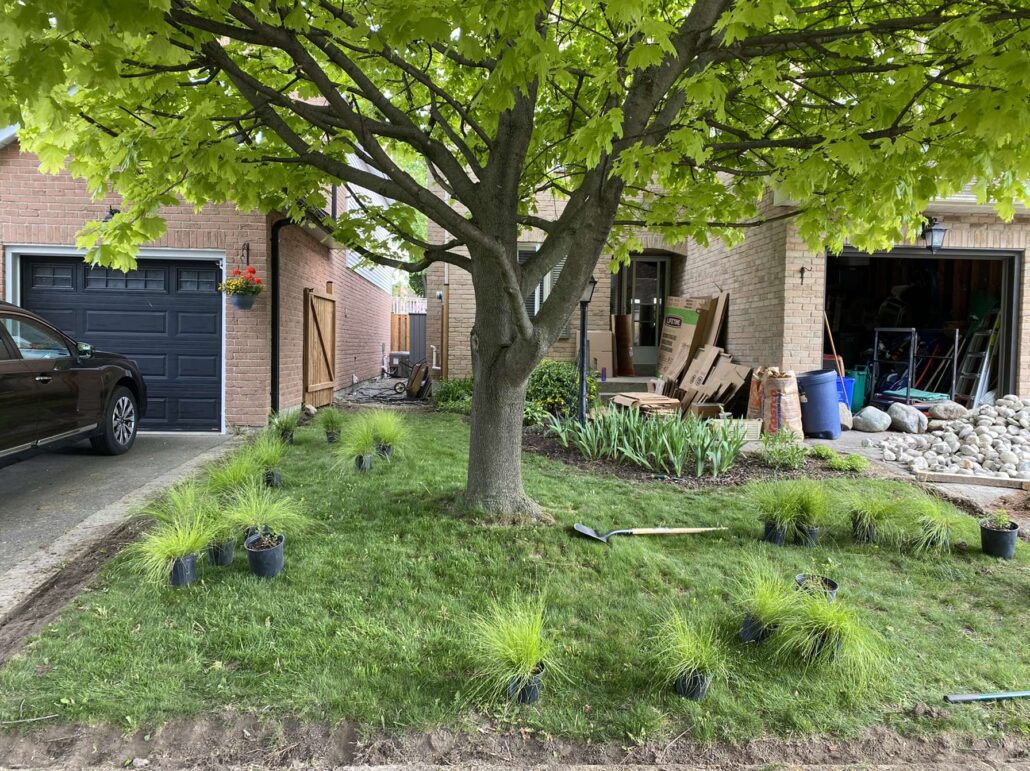
Step 5 : Large Plants
Before you lay the cardboard down, you should plant anything that needs to be planted deeper than a few inches. For our design, this included the 20 Pennsylvania sedges and the 4 New Jersey teas which all came in 1 gallon containers.
Step 6 : Cardboard
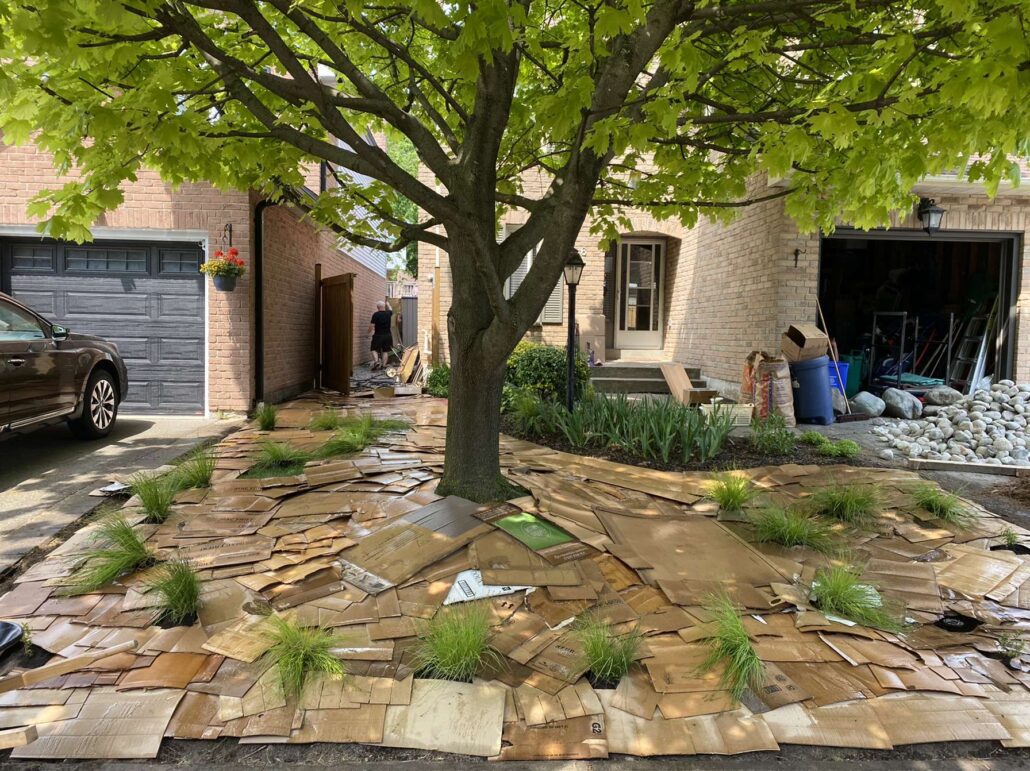
You are now ready to start sheet mulching. As the name suggests, sheet mulching involves adding many “sheets” or layers of organic material to your yard. The first of these layers is cardboard. To find recycled cardboard to use, try reaching out to local businesses!
The cardboard acts as a barrier to stop grass and weeds from popping up in your garden. It kills these unwanted plants turning them to food for your new plants. You can wet the cardboard to kickstart the decomposition process and help it stay in place. Be sure to overlap your cardboard generously to stop weeds from slipping through the cracks. Most people will use landscape fabric to achieve this, but the downside to landscape fabric is that it is a permanent barrier that stops your plants from accessing the soil underneath. Cardboard has the added benefit of decomposing over a year or two and adding even more organic material. Remember to remove any tape, staples, or anything else that won’t decompose before laying your cardboard down!
Step 7 : Rocks
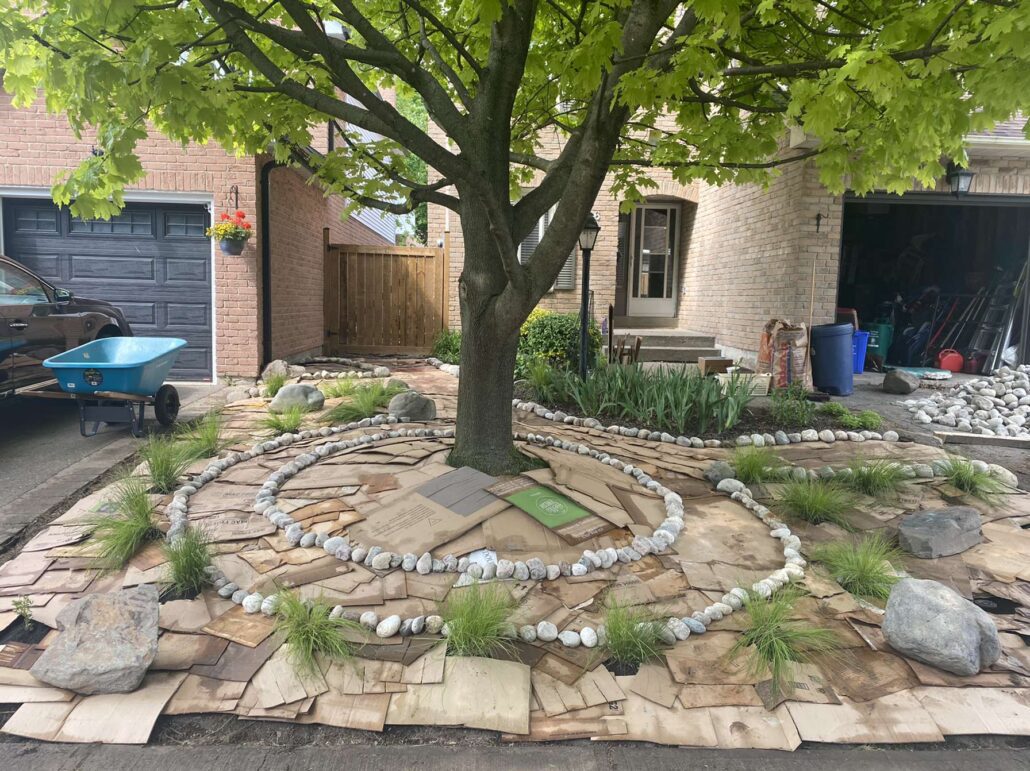
This step is totally optional when it comes to sheet mulching but I think it is an important design element as it adds contrast and balance to the garden. We used the river rock to separate the garden beds from the walkways and the larger boulders to add interest.
Step 8 : Topsoil
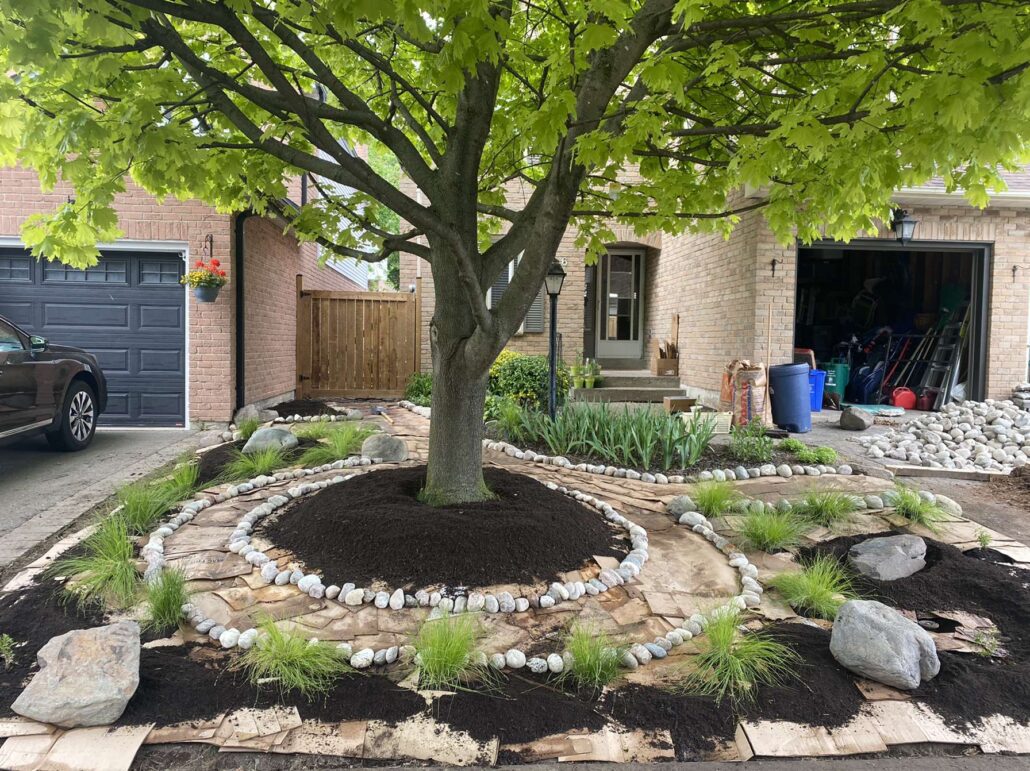
Now that all the grass and weeds are covered up, you can create piles of soil in which to plant wildflowers and other perennials. We used the premium triple mix from our local landscape supply store.
Step 9 : Small Plants
Plant the remaining plants in the mounds of soil. We used bunchberry, columbine, ginger, coneflowers, and bottlebrush grass for a variety of textures, colors, and bloom seasons.
Step 10 : Woodchips
Now for the final step, add a thick layer of woodchips over your garden beds and your pathways. The woodchips will help keep moisture in and weeds out. Plus, they help give that finishing touch that the garden needed so badly. The woodchips transform your front yard from a construction site to a serene native plant garden. We also had a bunch of rocks leftover so we outlined the rest of the yard. Now all that’s left is to sit back and enjoy as your neighbors walk by and shower you with compliments!
If you have any questions about sheet mulching, native plants, or garden design, feel free to shoot me an email at scott@carrollpropertyservices.ca or give me a call or text at 289-943-5477.
Thanks for reading!
Scott Carroll
Carroll Property Services